
An asset, as defined in the context of Consumr.ai, refers to any output or intelligence created or collated by Consumr.ai that can be saved and used later. It may or may not have an expiration date. There are three forms of assets: namely, Report Asset, File Asset, and Research Asset.
As per the current version of Consumr.ai, users can only save one form of knowledge created by our platform: reports. Now, expanding our horizons, we have introduced two new forms of knowledge bases that can be interpreted by Consumr.ai, learned from, and drawn conclusions from. We wanted to define a term for the knowledge base we create, store, and learn from. Hence, we named it ‘assets’ to put more emphasis on its value within our platform and for our clients’ businesses.
An Asset Table is an upgrade to the current report table that we have on Consumr.ai. We have modified this table keeping two problem statements in mind:

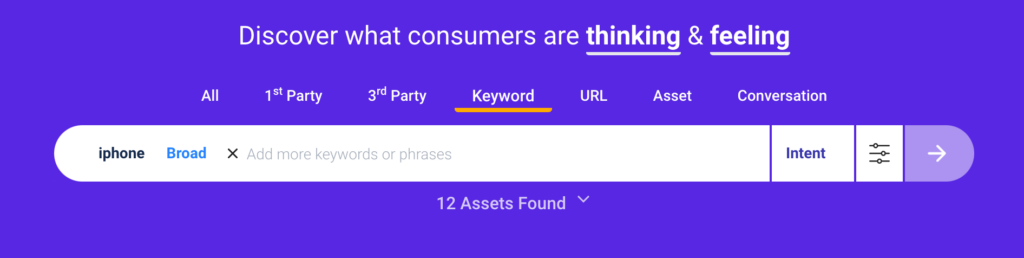
As you can see in the screenshot above, the link to view the Asset Table is right below the Omnibox. In an event where you have not typed anything in the Omnibox, this link will be present for you to refer to the existing assets within Consumr.ai. Clicking this link, you will see all the assets created in the last seven days. You will have the option of changing the date range.
If you choose to enter at least one input in the Omnibox, the system will try to locate any asset that contains the term you have entered. If it cannot find any asset, it will remove the ‘view asset’ link and encourage you to create a new asset. On the other hand, if the system locates one or more assets created in the last seven days, it will change the link to give the user a count of assets found with the same term. Clicking that link will open the Asset Table showcasing only the assets that match the term entered in the Omnibox.
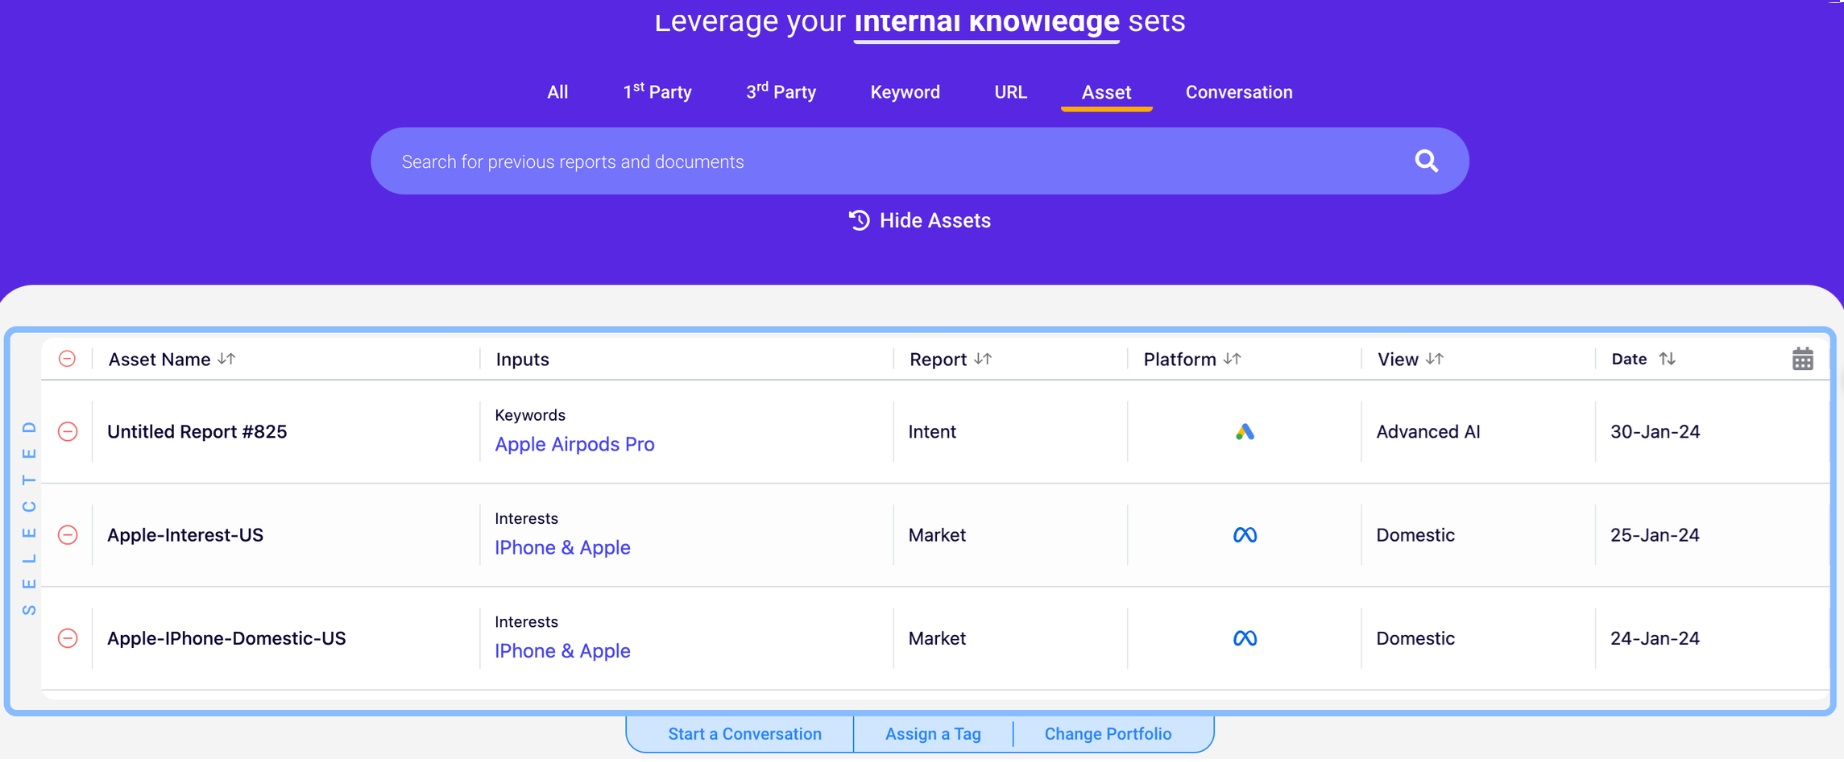
If the asset is a Report Asset, as seen in the screenshot above, you can view it in a tabular format. Let’s define each element of the table to help you read it accordingly:


This is a new type of asset that allows a user to add internal and organization-specific knowledge to Consumr.ai, allowing the platform to learn from assets created from the platform and uploaded assets (files) to curate a more evolved response.
These assets do not feature in the Asset Table but are shown directly in the Omnibox dropdown and the Asset Management page.
A Research Asset is knowledge that is acquired from public sources available on the internet. When a user asks a question that is not related to a Report Asset or is not available in an already uploaded File Asset, Consumr.ai goes into exploration mode and goes through the top links available in search results. It learns from these sources and curates an answer. This answer can be saved as a Research Asset.
This asset is also available in the dropdown on Omnibox when you choose the Asset tab at the top.
In the Asset Table, there are different types of reports that a user gets to see. To help a user see and select the right report asset, there are many columns. However, not all columns are equally important to all users. Hence, we have the option of customizing columns that are user-specific in nature.

As shown in the screenshot, click on the “+” button to see the dropdown and select the columns you want to view at the moment or save them as presets to view the exact columns each time you log in. You can also change the placement of the columns as per your preference. For example, if you would like the first column to be the Asset ID, you can drag the column using the mouse.
There are two ways that you can action assets:
This feature is the same as the current feature, where the user can share a report. However, the two rules of sharing have changed:
Selecting an asset is a feature that enables a user to pick one or more assets and carry out a group function with them. The following are the group functions that are available once the assets are selected:
consumr.ai is a consumer intelligence platform that analyses behavioral data from tik tok, meta, google, snapchat and pinterest to tell you what your audience thinks, searches, buys and content they consume. Unlock the power of first party intelligence strengthened by real time behavioral signals from digital marketing platforms.
consumr.ai is a consumer intelligence platform that analyses behavioral data from tik tok, meta, google, snapchat and pinterest to tell you what your audience thinks, searches, buys and content they consume. Unlock the power of first party intelligence strengthened by real time behavioral signals from digital marketing platforms.